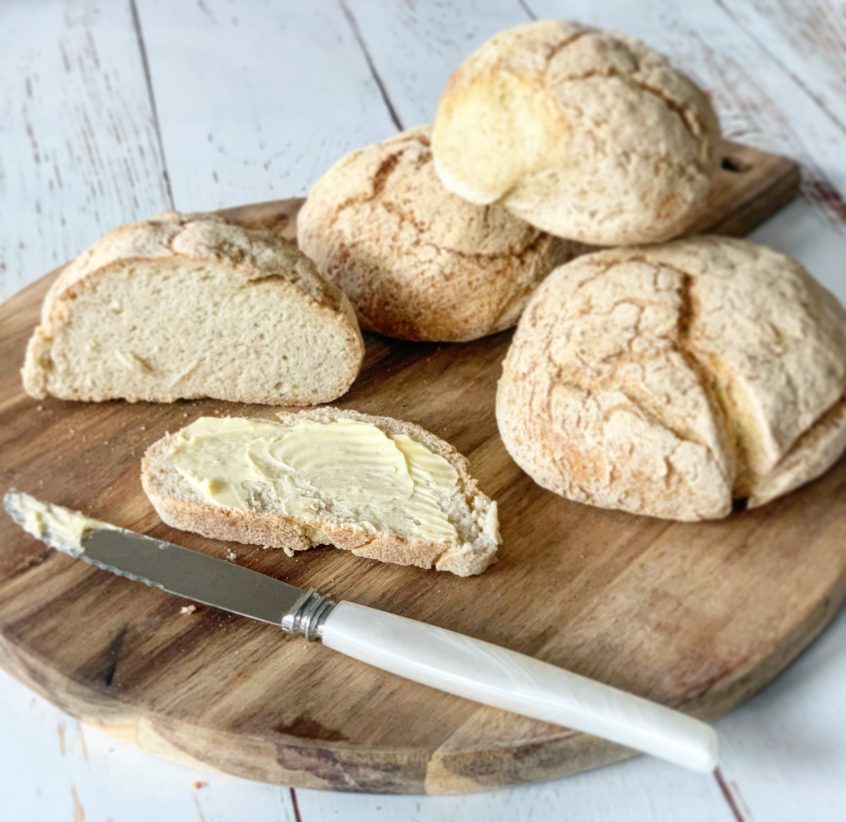
Since the COVID-19 isolation situation has been underway I, like many others, have taken to mastering the art of sourdough bread! I have several coeliac and gluten-intolerant friends so I wanted to create a gluten-free sourdough as well. The nature of gluten-free breads is that they are quite dense, this have found they turn out better as bread rolls rather than loaves – as they don’t quite cook all the way through… Feel free to experiment with this recipe though!
I, personally love a Rye Sourdough just with a little Olive Oil & Salt. But this gluten free sourdough goes great with homemade Pâté or homemade Jam!
This recipe assumes you have already made your Gluten Free Sourdough Starter mother culture – this process takes 7-10 days. I followed this guide to make mine.
Ingredients:
Levain:
- 75g Starter Mother
- 75g flour (flour that you normally use to feed your starter, I use quinoa)
- 75g water
For the loaf
- Levain
- 100g quinoa four
- 100g millet flour
- 100g brown rice flour
- 50g white rice flour
- 50g sorghum flour
- (alternatively you could use 400g of a generic “Gluten-Free Flour” blend that you might have, if doing this and your generic mix already has some kind of ‘gum’ in it, then don’t add the extra below). Another good flour combo is 100g brown rice, 100g millet, 100g sorghum, 50g potato starch, 50g buckwheat – total of 400g.
- 3 tsp xanthum or guar gum
- 1 Tbsp psyllium husk
- 1 Tbsp honey
- about 400mL water
- 10g salt
Method:
- Prepare your Levain by mixing the Levain ingredients together in a jar or bowl, then leave on your counter (covered with tea towel) for about 5-6 hours to get fully active.
- Place your flours and xanthum gum in a bowl.
- Once levain is active, add about 100ml of the water, psyllium husk to the levain and stir.
- Quickly add this mixture to your flours with the honey. Bring mixture together, keep adding water until all the flour is incorporated (you may use all the water, but sometimes I find I don’t need it all). You want it just combined, not too sticky and wet.
- Once it’s just combined, allow the mixture to autolyse for 30mins.
- Add salt then turn the dough onto a floured surface and kneed for about 2 mins.
- Shape the dough into the shape you want to bake it (can also be bread rolls).
- Prove your dough in proving basket/lined loaf tin/greased bowl/on a floured surface under a damp tea towel on the bench for 2 hours or in the fridge for 6-18 hours (the second option works well if you want to bake first thing in the morning).
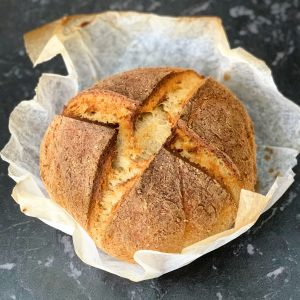
- Preheat your oven and a casserole dish/dutch oven within your oven to 250degC (or as hot as it will go), usually takes about 30-45mins. While oven is preheating, score your dough with a serrated knife to make a ‘baker’s mark’.
- Once heated, carefully remove the dutch oven/casserole dish, transfer the dough/rolls on a piece of baking paper into the dutch oven, cover and return to the oven. If making rolls, you may need to bake the rolls in 2 batches.
- Reduce temperature to 230degC and bake for 45mins with the lid on, then carefully remove the lid and bake for a further 10 mins (or until golden).
- Remove from oven carefully and allow to cool before devouring or slicing and freezing.